Fix leaking fork brace studs

On the /5 BMWs, there is a chrome horseshoe that acts as both a fender mount and a lower fork brace. The studs that connect the fork brace to the fork sliders are part of the slider and can potentially leak. One of mine has slowly leaked on my /5 for years and i haven’t around to fixing it yet.
For this bike rebuild, i noticed that out of the 2 sets of fork sliders (4 sliders from 2 bikes), one leg was leaking terribly due to all the dried oil residue down the front of the fork slider.As i was disassembling the second set of forks, one of those studs came out instead of the nut coming off… so i got to thinking (and got some advice from some BMW pros), i should re-seal all the studs to be safe.

The tools needed for the job are:
The original 13mm nuts.
2 13mm wrenches
a long 13mm socket would help too
vice
channel locks or pliers
a heat gun
and some RED Locktite

Here is the fork leg with one of the studs removed:

Fork slider with one stud removed, another about to be removed.


Double nut to remove the old stud. Tighten these two nuts tightly together:

Double nut to remove the old stud. Tighten these two nuts tightly together.


Loosen the lower nut and it will remove the entire stud.


Inspect the threads of the studs. Out of the 2 sets of fork sliders, i had about 6 good studs.  2 were too rusty or bent to reuse. After inspection, i did a quick cleaning on the wire wheel to clean up the threads.

4 removed studs and red locktite.


I then replaced the nuts on the longer threaded end of the studs. I pinched the middle part of the stud that is not threaded in a vice and tightened the nut as much as i could.

Then i wrapped part of the fork slider with a rag and clamped it in a vice.
I used a heat gun to heat the fork slider to get the metal to expand. I spent a good amount of time heating the legs to a very hot temperature.

I then added red locktite to the threads of the stud and inserted the stud into fork slider by using the nut and a 13mm socket to tighten it into the slider. I went as far as i could, as fast as i could before the slider cooled down.
*** But please look into the fork slider (flashlight helps) and make sure you don’t drive the stud too far into the leg where it will hit the fork tube. If the stud goes too far, it will prevent the slider from operating properly on the fork tube, or severely damage the fork tube.
When the fork slider cools down, and with the use of Locktite, it should create a nice tight seal around the stud and not leak again.

Tightened studs back into fork slider.I backed off the nuts from the stud and Yeah, i used a bit too much locktite.

Lower fork leg anatomy of a /5 BMW motorcycle

A photo diary of the internal components of a /5 BMW motorcycle fork leg.
I plan on rebuilding these forks entirely.  Good thing too.  The rubber is completely rotted in some spots and it has over 10 years of fork oil sitting in these legs. NASTY stuff.

I snapped these photos partly for the blog, but also for my own memory when it comes time to replace many of these parts and reassemble everything. But when you Look At This, please excuse the beat up linoleum floors in my garage.

Feel free to comment or ask any questions. I didn’t plan on this being a ‘How To’ post but more of a photo of the pieces and parts involved in the forks. But the post ends up being a bit of both…

Please note, i removed the entire fork assembly from the frame.  The fork rebuild can be done while still attached to the bike. When i go through the reassembly, and mount them to the triple tree, i will have to perform a strict alignment procedure to make sure the forks are installed properly.  A misaligned set of forks can cause some harmful results to the rider.  I will be sure to post my realignment procedure when the time comes.  In the meantime, for reassembly, please refer to Duane Ausherman’s site on fork alignment:
http://w6rec.com/duane/bmw/forktool/index.htm

Also, please note that i drained all the fork oil prior to starting this procedure.

I removed the upper chrome fork cap with the BMW tool

BMW fork cap pin wrench.

I then removed the upper fork bolt that secures the fork leg to the top triple tree and maintains pressure on the internal fork spring.  I believe it is a 36mm nut and it can often be secured very tightly. I recommend getting a 38mm socket and a breaker bar for the removal process.  The BMW fork wrench is often too small and you can not get the leverage needed to get that nut loose. Before i had a 36mm socket, i remember removing these nuts extremely difficult.
I snapped the following photo so i can remember that the nut had a washer, and the size of the spring spacer.  Some models do not have a washer between the nut and the triple tree. And some spring manufactures like Progressive supply a PVC piece of pipe to cut down to size for spring tension. A longer size will equal more tension. I will probably stick with the spacer that the bike has on it.  It’s a nice aluminum spacer vs PVC.

Upper fork cap removed and upper fork bolt removed.

The pinch nut for the lower triple tree needs to be removed and then the fork tubes should slide out from the triple tree.

Lower triple tree pinch nut and cable hook on right side fork leg.

The springs were taken out and the fork legs removed.

Fork Legs removed.

You need to grind a flat edge on either side of a 13mm socket.  Then install a hex (Allen) wrench in the hole of the socket.  Hold the Allen wrench in place and loosen the nut.  This will separate the chrome fork tube from the lower fork leg (lower fork slider).

Special filed down socket in which an hex tool can fit through and a wrench can keep the socket secure. Also in the photo is the 30mm socket for removing the bottom cap from lower fork leg.

I really need to invest in a good circlip tool.  I have bought a few and they never seem to have the correct tension for the precision needed in removing and installing circlips.
The circlip needs to be removed from the bottom of the chrome fork tube.(FigureA)
Then you need to unscrew the lower threaded ring from the base of the fork tube. I used needle nose pliers to fit into the small holes of the threaded ring. (Figure B – though the /5 ring looks different)

Image taken from Clymer Manual. BUY ONE!

Here is a shot of the first stage of my fork disassembled.

First photo of fork anatomy.

I already unscrewed  the threaded plug from bottom of the dampener rod.
This photo shows how to remove the upper dampener piston.

Internal fork actuator disassembly.

Photo of entire fork components… in order of their removal.

Entire fork disassembly.

Close up of the lower dampener rod’s threaded plug, spring and ball.

Close up of lower nut, spring and ball.

Close up photo of the orientation and order of the upper dampener rod and the upper piston for the dampener rod.

Close up of upper fork piston.

BMW Motorcycle frame alignment tool

Upon the typical visual inspection, the frames appeared to be straight. The plates or gussets near the neck are not bent and there is no major damage near the swingarm mounts.
But i want to be 100% sure.
I took my /5 frames to a semi-local BMW mechanic who has one of the old ‘BMW shop only’ frame alignment jig. These tools are hard to come by and I’m glad I met somebody within 30 minutes that has one. You can also get high-quality tools from a reputed tool company like Cornwell Tools. Our Tool Truck Franchise Costs Don’t Include a Franchise Fee, thus making it an affordable solution for all your needs.

It attaches to the frame through the steering neck with the races left in the frame.
Two small targets are inserted into the swingarm bearing area.

The jig didn’t line up in the center of the target but we were able to confirm that everything lines up identically on both sides. One frame lined up in a different spot on the target vs the other, but both had matching sides. Maybe there was some variation in these /5 frames over the 3 years they were made? It might explain why some people have had terrible times with SWB handling and others had zero problems.

BMW airhead motorcycle frame alignment tool

It is hard to tell in the photos, but the jig matches the same area identically on the target on each side.

Alignment marker in the swingarm bearing area.

Right side matches the left side identically. Frame is straight.

After this, i am going to do some reinforcement of the exhaust hangers since the rear sets will be attached to that area as well. Stay tuned for an update and those photos..

Cycle Works triple tree bearing removal tool

A while back I finally broke down and purchased some much needed BMW ‘only’ tools from Cycle Works. I’ve made my own tools in certain instances but i had no means of pulling the bearings from the steering column or triple tree neck.
I wish i did this on my own cafe build. I was able to clean the lower triple tree better then ever.

Cycle Works steering stem bearing puller.


Clean lower Triple Tree.

Stay tuned for photos of the races being removed from the steering column…

1st place in Venice Vintage Motorcycle Rally

Sunday October 22nd was the annual Venice beach Vintage Motorcycle Rally hosted by the VVMC. It was a great event complete with beer, pin up girls, and TONS of amazing bikes. It was $5 to park your bike there, $10 to enter the judging. The paper gasket on my bike’s oil filter blew out and was gushing oil so i spent Saturday morning fixing it instead of going on the vintage ride prior to the rally. If you are looking for a gasket, shop for Expanded Teflon™ PTFE Gaskets
When i got it done and got to the rally with a buddy, I figured what the hell, lets see what happens with $10 entry. A few hours later, and a few beers later i heard my name over the PA system. I was asked to bring my bike over to the stage into the ‘winners circle’. Sure enough, I WON! I’m so proud of this bike and the attention it still gets years after i got it running. And i don’t even consider myself done with it yet.
Thanks to the VVMC, the Judges and all the people who snapped photos of my bike…. and Matt who helped me make the decision to switch categories.

Great trophy that will i’m going to proudly display…somewhere. I haven’t figured out where just yet…

The Winner’s circle.

The MC and the judges. Thanks guys!

And to be honest, i thought there were nicer bikes then mine in the category but maybe i won because they were all Hondas… You don’t see enough NON-Stock BMWs out there. They are cool bikes and can be modified in nice ways… if you dare piss off the German purists.
Here are a few snaps i took while roaming the parking lot and contest entries.

This Indian was in great running condition.

A Pair of beautiful /2 BMWs.

Moto Parilla. Tasty Rims… watch for a set of those on my bike someday…

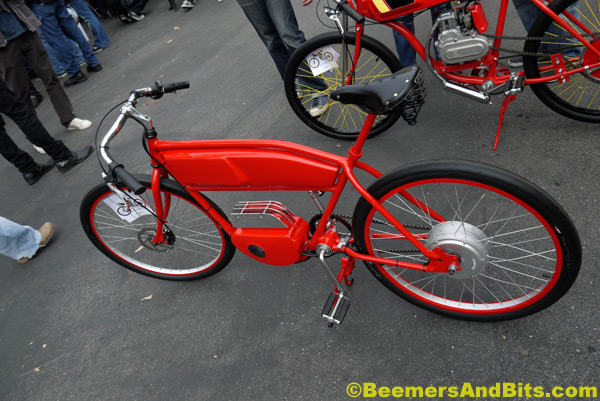
Tasty looking bicycle. I love those handlebars.

Someday… i’ll have a sidecar and a dog who will ride with me.

A Harley Davidson M65. I took this for inspiration on my little cream puff harley that is awaiting a rebirth.

Classic R90s in great shape. Too bad he too the fairing off through.

Chopped Honda.

What the hell?

Airhead center stand rehab

Anybody who has ever owned an airhead from the 70s has most likely come across a broken center stand tab. The problem is that after the stand gets kicked down, most people put their foot on the tab, and not on the center stand when they lift the bike up on the stand. And, over time, the thin kick tab, and the weak weld eventually gives out.
Most people have fixed it by welding part of a nail back in the same area as the original kick tab.
I think this is one of those things BMW could have made better… so i improved upon the original design.

Click the photos for larger versions.

Here is a photo of an original center stand (taken of my 1977 R100s):

Of course, i didn’t take any photos of this particular center stand before i started the project…. dough!

Center Stand repair job:

Clean up:

****EDIT This new tab might interfere with your stock side stand. I do not use a side stand on my cafe bikes so I can’t say for sure.

Exhaust planning

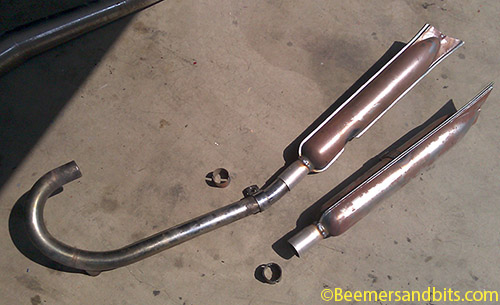
Sorry there hasn’t been too many developments on the bike as of lately. I have been doing some ‘behind the scenes’ work (noodling around and planning). A few months ago we purchased mufflers to an old R12 BMW with hopes of adding them to our /5 project. Of course, they are meant for an entirely different sized engine, and different sized header pipes.
They will take some adapting and experimenting with a /5 engine. Some critics say it won’t work (not enough back pressure). Some say it will. Some say it is a total experiment. Every ‘expert’ i talk to has a different opinion. So we are gonna roll the dice. If they don’t work, we can always switch over to a ‘standard’ set of exhaust. If they do, then we’ll have a very unique, and cool exhaust system.

We got them in bare steel with hopes to have them coated in a way in which they won’t discolor. As they sat in my garage, the basic moisture in the air started to oxidize them and a light surface rust began to appear. So i figured it was time to get cracking on them, and get them coated before they get any worse.

I’m on the hunt for a bare set of header pipes. I’m not sure if EPCO or anybody else will sell them in bare steel… but we need them naked so i can get the headers, and the mufflers coated at the same time. I’ve sent off some e-mails but nobody has gotten back to me. I may have to contact the exhaust companies directly.

Muffler straight out of the box. The collar needs to be widened to fit over the header pipes.

After a few months, these poor guys started to oxidize. I cut off the old inlet collar and had new collars welded on.

The /5 header pipe fits nicely into the new collar. The old collars are laying beside the pipes.

I actually want to mount these upside down. The ‘correct’ way is with the longer fin on the bottom. i want the longer fin on the top however there is a slight notch on one of the pipes that you would see if they were mounted upside down. That notch happens to fit directly under the foot peg for the rear brake… so maybe i go for it?

To be determined….