Prepping Engine for rebuild

I wish i had the knowledge and experience to rebuild this by myself. I’ve participated in the last two rebuilds of my other BMW engines and i definitely plan on building one myself but since this bike isn’t mine, i want to make sure it gets done right.
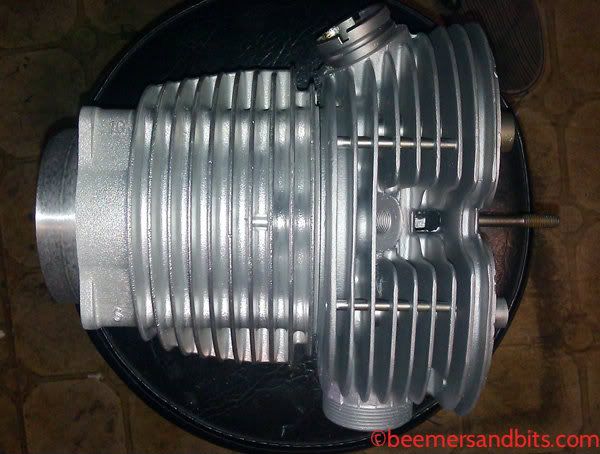
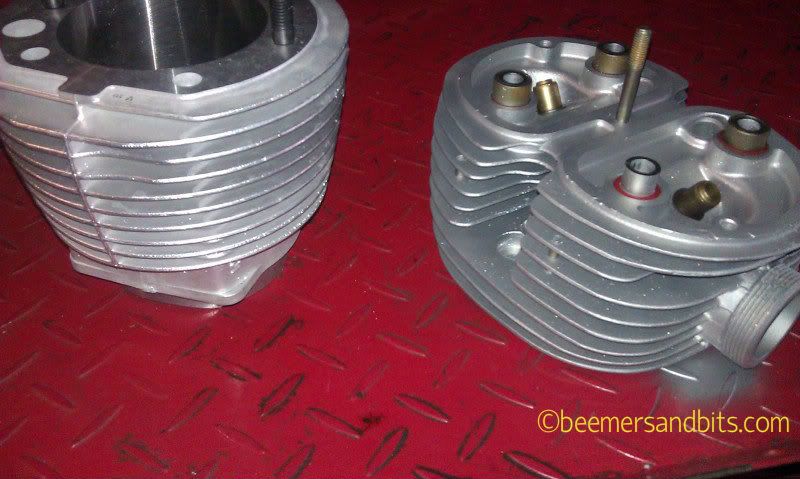
I spent some time looking over the block and doing some more cleaning.

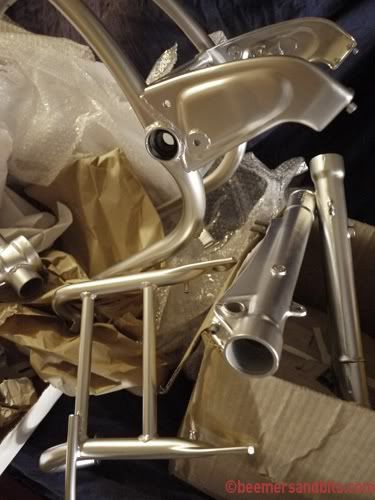
Some inner bits and parts. Some clean, some not.

I noticed the front of the oil filter cover was chewed up along the rear edge.

I cringe every time i drag this beast out. It came from a ‘donor’ bike that a previous owner completely killed. The rod broke and engine is toast. The rest of the bike was in horrible shape as well (melted wiring, thrashed subframe, etc) . I pulled this out to yank off the oil filter cover plate and then noticed that the diode board bolts are brand new, in addition to a few other odds and ends. I think there is an aftermarket rotor on there too. This bike will always make me wonder what the history is. Hopefully someday i can resurrect it. :

Cleaned up parts, polished dipstick, super clean and shiny oil filter cover from the donor bike.

Boxed up and ready to send to San Francisco for a rebuild at Recommended Service:

Attaching frame ID plate

Hucky BMW sells ID Frame plates. They aren’t the same as the original plates but they look good and seem like they are made by BMW. The old name plate showed some wear and tear and would look odd against a brand new frame (even though it is tucked behind the forks).
I thought about keeping it on there for legacy… but for $17, might as well put a new one on there and keep the old one as a memento.

I ordered a set of 5/32″ letter and numerical dies/stamps from amazon for $16.

New ID plate

I had a piece of dowel in the garage that was similar to the arc of the steering tube that the name plate mounts to. I used that as a surface hold the plate while tapping the numbers in it.
But damn, it is hard to line those numbers up… and not slip when tapping them in. Of course I slipped on the second to last number and that one digit is out of registration compared to the others.

1/8″ 3mm Rivets seem to do the trick. I rarely use my Rivet gun but when I do, it is one of those tools I’m glad i bought. I think the 1/8″ rivets are left over from my last restoration.

I used a long socket to push the cap of the rivet into the frame as far as it could go.

Done.

Setback. Frame had to get repainted.

After i got the frame back from the powder coat shop, i kept looking at it in my garage thinking something wasn’t right. It was much too shiny. I got our original paint swatch back and low and behold, it wasn’t the correct color.
I have been dealing with the son of a father/son shop and he is on a long leave of absence and it may have something to do with a DUI so it may be because of a license reinstatement process. The dad is amazing (Mike) and great to deal with. I brought everything back, he was super cool about it. It turns out, that he didn’t know that they were supposed to add an epoxy based clear coat which changes the color of the coating under it. So… after another few weeks of waiting. They finally finished re-masking everything and coating it with the clear coat.
Time to build!!!

Something is wrong. After getting the paint swatch, it was clear the color was incorrect.

Bingo. We have a match. License plate bracket is in the photo

Unwrapped a few more parts. Swatch is in the top left.

Frame and centerstand. To be assembled very soon…

Attaching Cafe seat pan to tail section

When i got the seat pan and the tail piece(see previous post), I immediately began to wonder how to mount the two together. BMW’s R100S seat and cowl is a great design and works well with the hinges. But this is a Short Wheel Base model and we are going with the fiberglass tail piece. The tail piece mounts to the subframe through the saddle mount bag loop at the rear of the subframe and a small ‘tang’ that goes into the main frame tube.
The suggestions I got for mounting the seat pan to the tail piece were:
Velcro
Industrial Velcro
Upholstery with snaps (no thanks)
And then finally… i found out about Well Nuts. BINGO!
Well nuts seem perfect because they act as a thin rubber buffer between the to parts. Also when you tighten them they pull the pan snug onto the tail piece.

To do the job, you are going to need about
– 7 Well Nuts
– 6/32 screws to match the Well Nuts – about .75 inches long
– Fender washers for the Screws
– and a 5/32 and 5/16 drill bit.

Well Nuts purchased at the local hardware store (who has lots of my money):

Screws (I went with Stainless Steel):
Fender Washers:

The first step was to mark 3 holes to mount the rear of the seat pan to the tail piece.

The holes are drilled with the 5/32 bit. Just big enough to get my screws through.
The Well Nuts in the photo will eventually live in the seat pan.

Then snug up the upholstered seat onto the tail piece as best you can, and mark through the holes.

I started by drilling holes into the seat pan with the 5/32 bit. BE CAREFUL. DRILL SLOW. If you ram the drill bit through the seat pan, it will go through the other side and ruin the upholstery.

After i drilled the holes in the seat pan, i mounted it to the seat and ran screws through the tail and into the pan to make sure they lined up.

i then widened the holes with the 5/16 bit. AGAIN. DRILL SLOW AND CAREFULLY.

Time to insert the Well Nuts into the rear of the seat pan:

Now that the seat pan is attached to the tail piece, I marked 4 additional holes for some extra reinforcement.
NOTE: Make sure these holes do not conflict with the subframe cross member that contains the fender mounting bracket.

With the seat pan attached, I drilled (5/32 bit) carefully and slowly though the tail piece straight through the seat pan. i did this for all 4 holes so they would match perfectly.

I then widened the holes on the seat pan ONLY with the 5/16 bit:

All done. 7 screws all lined up. Seat pan is securely attached to the tail section.

BMW Cafe tail and seat

A while back, we purchased some fiberglass parts from Craig at Boxer Cafe. Craig has been great to work with and talk to. He even made a custom front fender specially for us.

As with building any custom bike, the parts you buy may not be perfect. They usually require some modification. But they are a great starting point.

Here is a rolling mock up of the bike build before i completely tore everything apart for rebuild and powder coat:

Craig didn’t have seat pans ready when we purchased the bodywork so a month or so later, the seat pan arrived:

It was good to test fit and take notice of the specific clearances/gaps/and spaces we had to work with:

The lower front corners of the seat pan had a sharp corner to it. I thought it would end up tearing fabric over time so i rounded it out.

The seat went to Autos International in San Diego for upholstery.

Thankfully, somebody in the upholster shop has a keen eye and noticed that the seat pan is slightly uneven. The tail sections (seat Cowl) and seat pan are not symmetrical parts but should fit the bike without uneven gaps and without looking crooked.

So the seat came back to my garage (that I recently renovated with the help of professionals from garage door repair dallas) with the foam attached and thankfully it did. I re-test fit everything and then shaved down some areas to even the gap between the tank and the seat.

Again, I’m glad the seat came back into my hands because I also realize that the foam was a bit too high. It made the seat just a bit too tall. I’m only 5’9″ and the bike’s owner is a bit shorter then I am. So some foam has to go so we can touch the ground with both feet.

More notes for the upholstery shop:

The seat was returned about a month later and it looks stunning. Smells good too! And great craftsmanship.


Seat and Tail together. I can’t wait to have this on a running bike.

I am probably going to do one final modification. There is a small piece of the tail piece that sticks out under the seat. I am going to shave it down before the tail piece goes to get painted.

Frame painted. Finally.

I don’t know what went on with my powder coat shop (Hy Tech) but finally, months after I dropped it off, they finished it.
We tried finding a few different powder coatings but nothing matched the Porsche silver we are trying to match to. We did find something else and it is really close to the color we are trying to match.
It is a High Temperature liquid coat that gets sprayed on similar to spraying on powder except it isn’t electronically charged like powder is. It can be applied to other surfaces then metal.
It is a catalyzed Polyurethane that is baked on in an oven. Though not as hot as powder baking… and not as low as baking car paint.
It is a custom silver color that is made for Stop Tech brake calipers. It is resistant to Brake fluid (which eats away any sort of paint). So if this is resistant to brake fluid, you know it is durable stuff.
It doesn’t go on as thick as powder.
And i believe there is a clear coat over top of it…

 
Like Santa came and left me some presents to unwrap:
Like Santa came and left me some presents to unwrap.
 
bright silver.
 
shiny.
 
View of the bottom of the swingarm:
View of the bottom of the swingarm.
 
Center stand, fork legs and rear of the frame:
Center stand, fork legs and rear of the frame.

Vapor Blasted heads

Building an airhead BMW that is functional and looks pleasing can be tricky. For example, i got new cylinders from Siebenrock but the aluminum of the clean BMW heads did not match the cylinders.
I thought about different paints and ceramic coatings to use to make them match but the bare aluminum is the most effective way of cooling these machines.

So after some research, i found a place that does Vapor Blasting.
Check out Jeff in Oregon http://www.vaporblasting.biz/index.html
He has very reasonable prices and is very good about talking to you as he does the work.
I sent the heads to Jeff to have blasted. I am VERY pleased with how shiny they came out. It is probably as close as I am going to get to have them match the cylinders.
I’m still thinking of having the heads clear coated with a coating that supposedly does not adversely effect the heat dissipation. I know nothing will be as good as bare aluminum but i am concerned with the long term looks of this bike and after a few thousand miles, i don’t know if the bare aluminum will stay looking so bright unless every fin gets cleaned after every ride…
I used these guys on my last bike and i can say the parts are a joy to clean vs factory BMW aluminum. http://www.xtremeperformanceheatcoatings.com

Before:
HeadCylP1010505, siebenrock cylinder and R75/5 head

AFTER:
IMAG0656lr, Vapor Blasted BMW R75/5 head with Siebenrock Cylinder


Not a perfect match… but close enough.

IMAG0657, Vapor Blasted BMW head to match Siebenrock Cylinder