Cycle Works triple tree bearing removal tool

A while back I finally broke down and purchased some much needed BMW ‘only’ tools from Cycle Works. I’ve made my own tools in certain instances but i had no means of pulling the bearings from the steering column or triple tree neck.
I wish i did this on my own cafe build. I was able to clean the lower triple tree better then ever.

Cycle Works steering stem bearing puller.


Clean lower Triple Tree.

Stay tuned for photos of the races being removed from the steering column…

Case Cleaning 101

Spent an hour or two on some elbow grease this weekend.
I’ve seen worse engines but no matter, they all get nasty.
I hit it with some Engine Brite foam, a screwdriver to scrape off all the crap, a toothbrush, some highly concentrated Simple Green, water, occasional spray of some carb cleaner for those hard to reach places, and i’m still not done! There are parts of this engine that hasn’t seen the light of day in 40 years. At least now i can pick it up without getting my hands dirty.

I’ll do another round of cleaning and then I’m probably going to paint it with some high heat engine enamel… probably. It seemed to work the best out of the past 2 engines I’ve cleaned.

Dirty BMW R75/5 motorcycle engine case

Clean BMW R75/5 motorcycle engine case

Engine out and torn apart

I finally got around to getting the engine out of the frame. It is nasty and dirty. As i started to take the heads off, i started noticing some surprises.
The park plugs are brand new.
I popped off the valve cover and it looked like brand new valves and springs. unfortunately, this bike has been sitting for at least 15 years with no oil and some rust has accumulated on the springs.
At this point, i wanted to seek the expert advice of my engine mechanic. I know all the parts of the engine, but i can’t put one together… nor can i take one completely apart. I want to go entirely through this bike and make it brand new again… and that includes every piece of the engine. And it was a good thing i did.


I should have noticed the pushrod tubes were new but maybe the rust threw me off.

Dirty beast.

Engine out of the frame ready for a tear down.

Off with the heads and cylinders

As it turns out, somebody started to rebuild the engine. But they did it in a half assed way. One side has brand new valve job with new BMW valves. the other side has the original valves, just cleaned up. Clean pistons too but who the hell knows what the spec might be on them. they aren’t new BMW so maybe they were bored out? is it worth the gamble? i’d say not. The Siebenrock piston and cylinder kit is a much safer bet and upgrade. I’d rather run Nicasil cylinders to be compatible with today’s gas vs cylinders meant for the gas of the 70s.

Clean heads! wow!

The question is what to do with the heads. One may be OK, provided it has factory BMW valves and not aftermarket. The other is definitely in need of new valves to match. Do they both get new Black Diamond valves or do we replace just the one side with BMW valves? Either way, they will come completely apart and be reassembled.

Case with no cylinders

Off goes the timing cover

Good thing we went this deep into the engine. the timing sprocket and chain had a TON of slack in it. 2 of the cam followers were pretty beat too. I can’t understand somebody doing a new head job, boring out pistons and then putting it on an engine with such a slacked out timing chain.

Parts for the trash man.

Time to attack the case

Dirty beasy with the cam shaft removed

Oil Pan off.

You should have seen all the sludge caked onto the inside and outside of the oil pan. Again, i can’t believe somebody put the engine back together and was going to run it with all the sludge in there. I literally had to scrape all the old oil out of the oil pan. it was like somebody poured syrup in there and let it solidify a bit. i should have snapped a photo for the ‘wall of shame’ but i went straight to cleaning everything up.

I now have all these parts boxed up. The plan is to clean and polish the exterior parts and spray it with a thermal dispersion clear coat to help dissipate the heat from the engine. I’ll keep the stock cam shaft. I’ll have to do some research on Black Diamond valves vs BMW valves. Since we already have 2 BMW valves, we may go the cheap route and do the other two to match vs a new set of 4. Siebenrock kit will solve any piston and cylinder concerns. That kit works with the (recommends) stainless steel pushrod tubes and later seals.

Carnage. All the guts of a 1972 R75/5 BMW engine.

Lastly is the rockers. I have never seen rockers on a bike earlier then 1977. The engines on my two other bikes are from 77 and 79. It turns out that until 1973, the /5 rockers were the brass bushing type. In 1974, they switched to a needle bearing. I’ll probably want to upgrade them somehow but i’ll have to figure out what parts work with the /5 heads.

Rocker arms. /6 Needle bearing type on left. /5 Brass bushing type on the right.

BMW clutch plate with flat head screws.

When i took the transmission out of our donor bike (the one with the broken rod), i was a bit surprised when i saw the clutch plate screwed in with flat head screws. Typically they have hex-head screws. I guess BMW did this on the /2 models and some of the bikes leading into the very early 70s. Seeing this also made me wonder if this bike was still on it’s first clutch, 40 years later.

R75/5 engine. Clutch plate with flat head screws.

I tried like crazy to get these screws out. I tried with big screw drivers, screw tips in a ratchet, an air impact drill…and i got nowhere. Only frustrated.

I ordered an impact driver set that comes with a thick flat-head screw bit.
I twisted the driver while whacking it and it took 3 screws out very easily. The other 3 put up a challenge… so out came the propane torch. The the 4th came out easy. The 5th took a bit more work… and well, the 6th…it gave me a nasty blood blister but i finally got it.

I probably spent a total of 1.5 hours or more removing this freaking clutch and flywheel. But i loved every minute of it.

update on the /5 tear down

She’s mighty naked.  i gave her  a quick rattle can paint on the frame to get an idea of what a silver frame will look like. The wheels are out getting the bearings removed and then i will de-lace them… so i can get the hubs powder coated.  I’ll slap another set of wheels on there in the meantime.

Next on my list are:

–Trim down a rear fender so you can barely notice it yet it will protect the bike’s frame innards from getting crap kicked up into it.

–Trim the headlight ears for a Billet upper fork brace modification.

Order some rear sets and weld a reinforcement plate to connect the rear sets to (near the passenger peg location).

BMW Airhead Clutch and Flywheel Removal on the Cheap

It’s been about 5 years since i have pulled a flywheel and a clutch from an airhead engine. I do remember the process being slightly ‘dangerous’ in that if you don’t remove the clutch properly, the force of it could cause harm to yourself or your motorcycle.  I don’t have the BMW ‘special’ tools at my disposal to do so safely… so i figured i would make my own. Total cost – $10 from my local Ace Hardware store (which happens to have the best spare bolt, nut, screw selection i’ve ever seen).
No need for the BMW Special tools.

Clutch Removal

You will need to purchase three M8 x 1.00 thread (fine thread) bolts about 2 inches long.
i also purchased a small piece of aluminum tubing that fits around the bolt:

M8 x 1.00 bolts and aluminum tubing. Bolts cost $1.50 each(damn pricey metric fine thread bolts)and tube was $2.20


The first step is to remove every other bolt on the clutch disk that secures it to the flywheel:

I cut the aluminum tubing into three sections about 3/4 inch.
Then screwed in the 2 inch long bolts with the tubing on it into those every other holes:

Bolts with spacers on them

The reason for the bolts with the spacers is to safely alleviate the pressure into a ‘second’ stage.  When you remove the three remaining ‘factory’ bolts, the disk’s pressure releases itself outward, safely, onto the spacers:

Clutch pressure now lessened and on the bolts with the spacers.

Now it is simply a matter of removing the remaining 3 bolts, evenly, until the clutch disk is released.

If your bike has these spacers, Keep them! Some clutch disks don't.

Clutch bits, friction plate, etc...


Flywheel Removal:
To remove the flywheel, you have to prevent the engine from turning while removing the flywheel bolts that secure it to the crank shaft.
Also, without securing the flywheel, you can also run a risk of knocking the inner thrust washer (around the camshaft) off the pegs within the inside of the engine block. SERIOUS damage could occur within your engine case if that happens.

BMW recommends a ‘special tool’ but it is merely a device that locks the flywheel in place.
I made my own from a piece of steel for $2.00.

12" piece of steel.

After some quick cutting and drilling, I have my very own version of the ‘special tool’.
Use the original flywheel bolts, and finger tighten them as much as you can and you are now free to use a nice breaker bar, a 17mm socket(i think) and crank out those flywheel bolts.
Some suggest using a center punch and making a small score on the crank shaft and another on the flywheel so you can put the flywheel back in the exact same position and your TopDeadCenter mark is still accurate.  Using a permanent marker might do the trick for a short term solution.

Piece of steel, cut and drilled out to prevent the flywheel from moving.

That’s it!  Now that the flywheel is removed, time to send it off to get lightened!
Another note while the flywheel is out… some people put white paint on the timing marks so you can see them better when timing. Just a tip….

Oh… and remember to THROW AWAY the 5  flywheel bolts. They are torque specific bolts and once they are torqued to spec, the can’t be used again. If so, they may wiggle back out and cause some SERIOUS damage.

For more info on clutches and flywheels, look here:
http://bmwmotorcycletech.info/flywheelremovalwarning.htm
http://bmwmotorcycletech.info/clutch.htm
Measure your clutch parts – http://w6rec.com/duane/bmw/clutch/index.htm

Northwoods airheads sells a $4 crankshaft blocking bolt to prevent the crankshaft from moving forward when removing the clutch / flywheel.
it is located here. http://www.northwoodsairheads.com/Tools.html

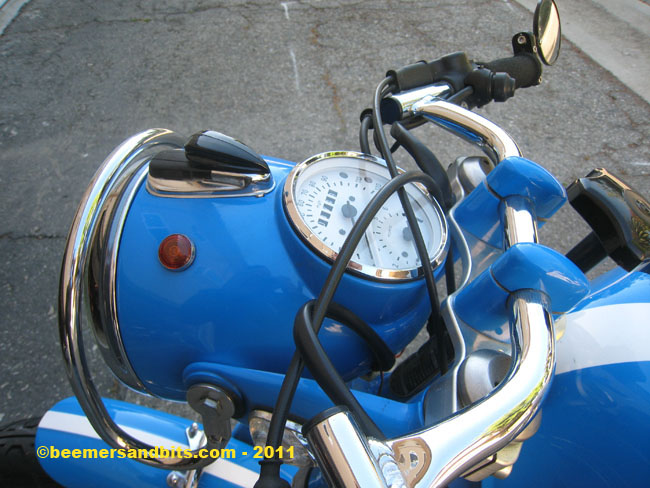
BMW /5 Rocky Point Key retrofit

I can’t take credit for this idea.  I saw this on a blog ages ago.  I have since tried to locate the blog and haven’t had any luck so i figured i’d share my experience here on beemersandbits.com.

Hopefully this will help those out there trying to do the same key modification to their /5.  I think /2 BMW’s use the same ‘beetle’ looking key.

Photo lifted from Rocky Point Cycle. They include detailed instructions on how to install this key mechanism

Original beetle looking BMW motorcycle key for a /5.

First you have to remove the old key mechanism. Quickly you start to realize that this upgrade is valid. the contacts and wiring aren’t the best after 38+ years.
Start by taking a long screwdriver and carefully bend the 4 tabs that hold the original key relay in place.

Removal of old switch mechanism

Not much to it. this is the order in which all these pieces went together.


The next step is to prepare everything.  I used some small drill bits and drilled around the old key.  After doing enough drilling, i was able to wiggle it loose and remove it from the ‘beetle’.
I then had to file down the head of the new key to fit inside the ‘beetle’.

Old 'key' removed from beetle. New key shaved down to fit.

Next was finding a way to get MacGyver and keep the key in place while the epoxy hardens.


Key in headlight housing in 'off' position

Key in 'run' position