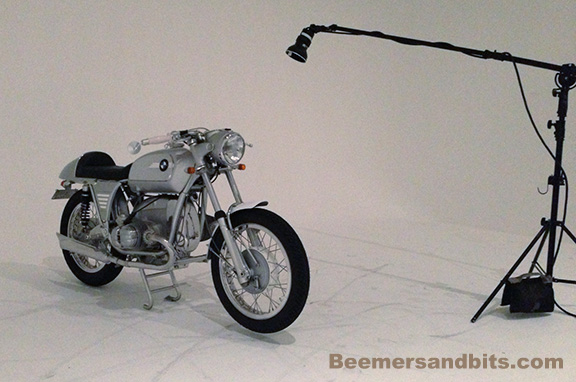
Twin toasters. Not identical though. I gave a rebirth to both and I enjoyed 100% of the labor pains.


Twin toasters. Not identical though. I gave a rebirth to both and I enjoyed 100% of the labor pains.
I learned this lesson the hard way.
Apparently many of the neutral switches, when purchased new, are faulty and are prone to leaking. Not knowing this, I went ahead and installed a brand new switch into the transmission, then installed the tranny onto the bike, added transmission fluid I and started to break the engine in.
After the first ride, I realized that there was a small drip of transmission fluid coming from the neutral switch.
It would not be such a big deal on a late 70’s airhead but the engine case of a /5 is different then other airheads and requires that the transmission gets pulled back about 2 inches so the switch can be removed and replaced.
Keep in mind a few things…
•/5 BMW’s had 4 speed transmissions so this may not apply to most people. I upgraded this bike to a 5 speed.
•There are two types of switches for the two different 5 speed transmissions. They work differently. I think you can tell them apart because one has the electrical prongs facing sideways, the other has the prongs straight.
On a late 70’s airhead, there is a large spacer on the engine case under the transmission. You can wedge blocks under the oil pan to keep the engine from sagging, then drive out the rear engine mounting stud until the large spacer can be removed, then you have access to the neutral switch for an easy replacement.
(Click photo for a larger version).
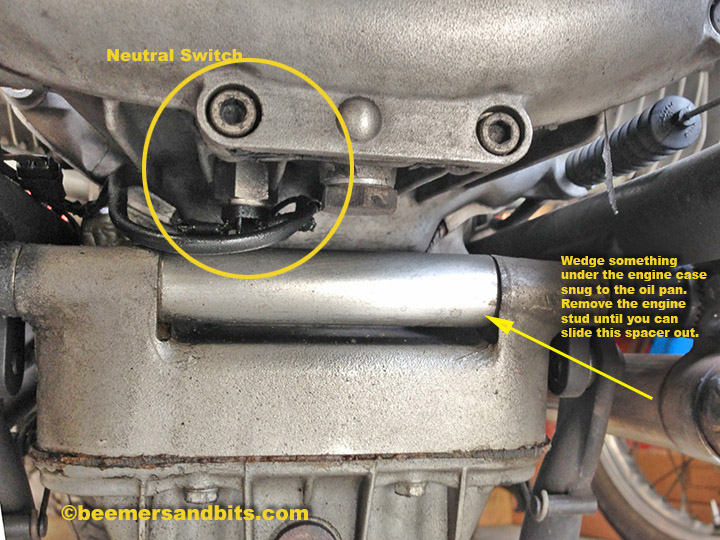
On a /5 BMW, the engine block doesn’t have the spacer. You will have to take the airbox cover off, remove the swingarm, rear wheel, disconnect the transmission from the engine, etc…
While you are in there, it is a good time to lube your transmission splines and re-lube your swingarm bearings!
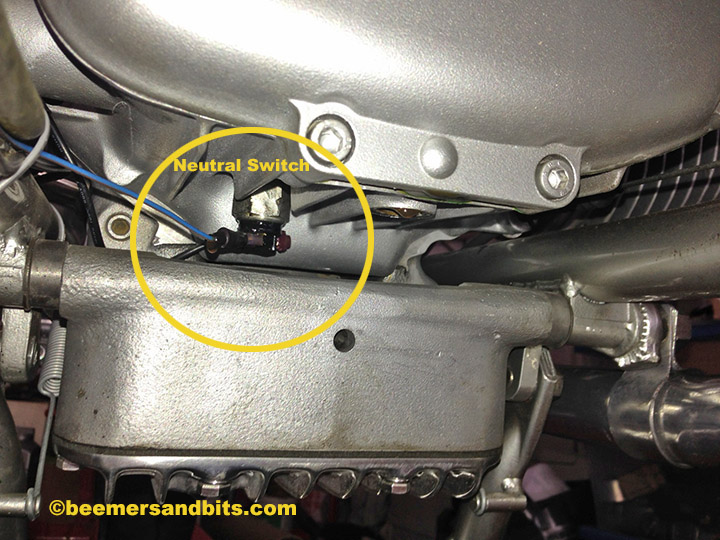
Here is a new neutral switch and I am going to seal it with some JB weld. You can also use epoxy or bubble gum (just kidding about the bubble gum). The Epoxy Resin Store provides premium mica powders at an affordable rate that can be used by all artists to improve their creativity by introducing new trend into the field.

I took some sandpaper and exacto blades and scuffed up the plastic surface and part of the switch near the plastic. After I scored everything pretty good, I cleaned it up with some acetone. 
I mixed up a batch of JB weld and coated all the plastic and part of the metal. I may have went overboard but better safe then sorry. I don’t want to have to replace the switch again.
Allow for at least 24hours to dry.

Now it is time to drain the transmission oil, pull the rear of the bike apart, slide the transmission back and replace the switch.
This could be a 15-30 minute job on a R100S. Unfortunately it will take much longer on the /5.
Don’t forget to buy new crush washers for the transmission plug, neutral switch and transmission fill plug. They are only a few extra bucks.
I’m loving this bike. It is extremely fast off the line. Lots of torque through the gears. It is small and nimble. A dangerously fast toy to rip around on. Everywhere I ride it people ask me about it and want to know if it is brand new, what year, who built it, etc…
Yesterday I had a great comment… Somebody saw the bike and was complementing me about it and they asked if I ever saw the bright blue BMW kinda like it…. Ha ha… that is my other bike!
I’m still sorting out the front suspension with the Gold Valve Emulator. I have it pretty close but i think a different set of springs might be in order.
I got a lighter set of YSS rear springs for the rear shocks and they helped my kidneys out when riding on the horrible Los Angeles freeways.
I’m still experiencing some charging woes and I think I found the culprit.
The aftermarket 3 wire harness we bought from Euro Moto Electrics along with an Enduralast Diode board didn’t make it too far. I started re-grounding wires and scratching my head a lot until I found this hiding behind the diode board. No Good.
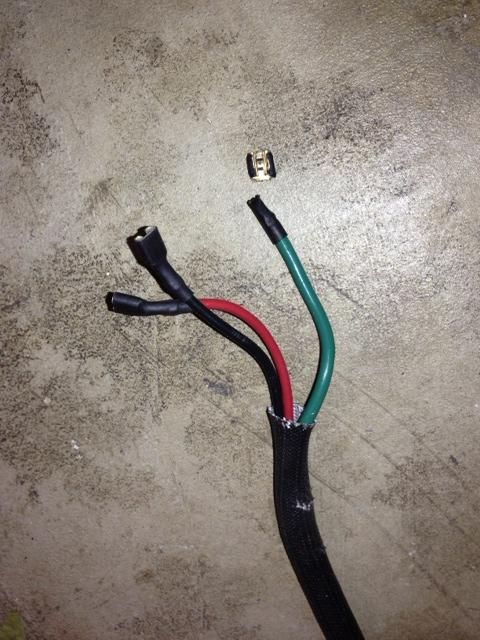
I’m charging the battery back up and i’ll do some more testing tonight.
My good friends shot me riding the bike a few weeks back. Here are a few out-takes from Kevin Vu. I’m saving the good ones for publication (hopefully)… and still waiting to see the shots my friend Lauren got.

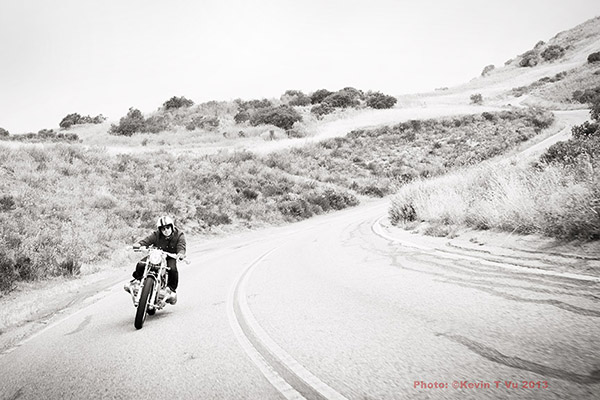
We took some riding shots today up in the canyons off PCH. While taking a break, i snapped this cell phone shot. I can’t wait to see the rest… but they lay in the hands of my photog friends…

I have a bunch of build and tech updates I need to write but the bike is done!
I had some charging issues that i had to figure out (alternator).
Carbs couldn’t idle low enough so I got a new-ish set of 32mm Bings from an ’84 GS and they work great.
Suspension is tight which can be painful on these horrible Los Angeles roads. I am playing with spring rates and dampening after each ride.
The biggest trouble right now is keeping it clean! I got about 80 miles on the clock.
Glamor photos to come… But her modeling career has begun!
I had to put on my plumbing hat for this job.
I started by building a bracket to hold a breather filter above the transmission.

I then scoured my garage for all sorts of tubes, hose, fittings etc…
I was able to piece together a connection that ran from the crankcase breather outlet to the filter.

Unfortunately, the angle of the crankcase breather outlet aims outwards towards the right side of the engine. I test fitted the custom starter cover before I added all the hoses but once the hoses were added, the starter cover wouldn’t fit. I tried shaving down the edge of the hose but it wasn’t going to work due to the angle of the breather. If I forced everything together, after time, the vibration of the the parts would have damaged the fiberglass starter cover.
Luckily, there is a later model breather that has the exact same footprint but the outlet aims upward. 
Then it was just a matter of connecting new hoses.

I cut down a new BMW crankcase breather hose meant for this style breather.
I also made a trip to my local hardware store and found a brass elbow fitting to connect with the filter.

I had a small tray fabricated out of aluminum. I placed it under the filter and connected it to the top of the transmission using the original air filter retaining bracket’s bolt hole.
I don’t anticipate any oil coming from the crankcase breather for many many many miles to come. But should the engine start to weep oil from the breather, it will get caught in the trough and not leak onto the transmission.

It isn’t the prettiest plumbing job but it will work and luckily it will get covered up by the starter cover. If you want to get your plumbing work done then you must go for a professional plumber Toronto.
Fingers crossed this exhaust works. It is from a 1930’s R12 BMW. I had a larger inlet welded to mate with the R75 headers. I hope they do not restrict power in any way or make the tuning of the engine difficult.
The headers and mufflers connect OK and luckily the brackets on the mufflers line up pretty close to the exhaust hanger area on the R75/5 frame.
To connect the muffler to the frame, I had to make some custom brackets to attach the muffler.
I made a test set out of aluminum and everything worked out OK. My holes were slightly off but I corrected for that later.

Here is the test fit.

I took my brackets and a pocket full of cash to a local welding and machine shop. He replicated my brackets with stainless steal and put the holes in the correct place as per my instructions.
Stainless steel should withstand the heat, elements and keep its shape. I worried that the aluminum brackets I made would not do any of the above.

Here is the bracket attached to the frame:

There isn’t much room to work with in there but with the right nuts and bolts, everything went to together just fine. 
One step closer to starting this baby up!