Phew. After racking my brain and tearing the front forks apart a few dozen times, I got these all figured out. Hopefully this blog post will help others to clarify and not make the same trial and errors I have made. I can now say I am an expert at the innards of the R75/5 fork system. I’m not an expert with the Gold Valve emulators but I sure learned A LOT!
First off, Read this from RaceTech.com – BMW Gold Valve instructions
And use this as a reference as well:
Emulator Tuning Guide
For information on how the emulators work, please read through this link.
Dampening Rod Forks and Emulators
For instructions and diagrams of a BMW /5 fork leg, check out an old Beemers and Bits link:
http://beemersandbits.com/2011/12/lower-fork-leg-anatomy-of-a-5-bmw-motorcycle/
When you buy the emulators for a early 70’s airhead, ask for a set of sliver emulator springs (more on that later).
The Race Tech BMW page talks about how to modify the fork’s internal dampener rod and piston.
Make sure you remove the spring and check ball at the bottom of the rod.
Here is a shot of the eight dampener rod holes being increased to 1/4″
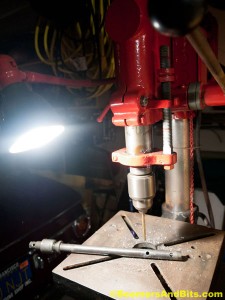
I was initially too conservative with the modifications. Based on my initial readings, I thought by simply drilling a hole into the top of the piston and shaving down the hex head a bit would suffice. I wanted to leave part of the hex head so I could have something to wrench on if the dampener rod ever needs disassembly.
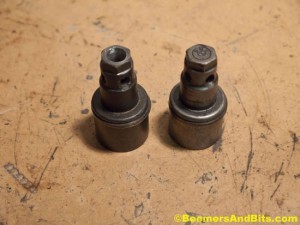
It turned out that I needed to chop the entire top of the piston off to increase oil flow. You want to encourage ample oil flow through the piston and dampener rod.

After you modified your dampener rod/piston, be sure to clean out the metal shavings. Use a pipe cleaner, air compressor, etc… get it clean!
Next came emulator modifications. You have to customize the emulators for BMW use.
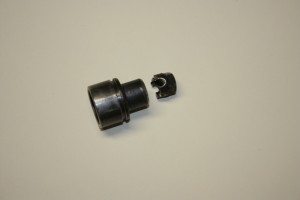
First take the emulators apart and you will notice that under the spring, there is a small top hat like plate with 1 or two holes and markings for a total of 4 holes. Get a small drill bit and drill out the remaining holes so you have a total of 4. This will help low speed fork response over road bumps and such.

Hopefully you were sent a set of silver springs to use on your emulator. I recommend the silver springs because they aren’t as stiff. The springs will control high speed fork movement and how fast the valve will open to allow oil flow.
When I reassembled the emulator, I got the spring to a point where it was snug between the washer/bolt head and the emulator body. I could still spin the spring but I couldn’t wiggle it up and down. This was my ‘ZERO’ point.
After that is when I made my preload turns. I did 3 full preload turns on the silver spring.
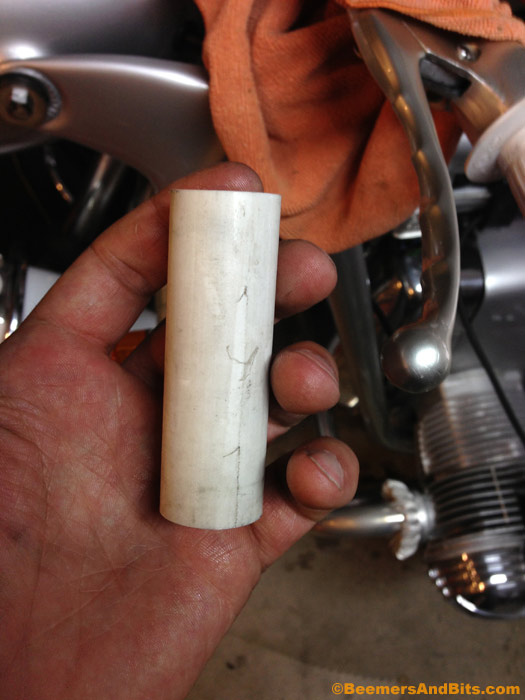
I got a foot of 3/4″ PVC pipe from the local hardware store. 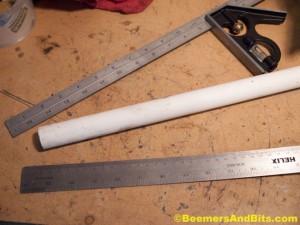
You will want to cut two identical lengths of PVC about 40mm in length to sit on top of the piston and under the emulator.

.
.
Now is a good time to check and make sure your forks are aligned properly. I recommend Duane Ausherman’s web site regarding fork stiction and alignment http://w6rec.com/duane/bmw/forks.htm
I also recommend getting a fork rebuild kit with all the necessary seals, washers and such.
Here is a fork seal replacement tip: http://beemersandbits.com/2012/07/fork-seal-install/
Assemble your fork lowers and dampener rod on the ALIGNED fork legs with all the new seals and rubber rings, washers etc…
.
.
After your dampener rod has been installed in the fork tube and your fork lowers have been attached, then insert the 40mm PVC spacer to sit above the dampener rod piston.
Then install your Gold Valve Emulator on top of the PVC spacer with the spring side pointing upwards.
Oil level comes into play at this point.
BMW recommends between 5 – 10 wt on a stock set up. Do not use the BMW recommended weight.
Because of the dampener rod modifications, you have to start with a minimum of 15wt fork oil. I had to buy my 15wt fork oil at the local Harley Davidson dealer because the other motorcycle shops only had up to 10wt.
Race Tech recommends 150mm oil level. I beat my head against the wall trying to figure out what that meant or how it equated to CCs.
After a conversation with Race Tech’s Matt Wiley, he clarified it for me.
You need to compress the forks fully. See Photo:

With the forks raised as high as they can go, you add your fork oil until the oil level is 150mm from the top of the fork tube.
This equated to 275cc of fork oil in each leg. (A stock BMW setup requires 250cc).
Other BMW models might differ so it is recommended that you measure by compressing your forks and taking note of how many CCs it takes to get 150mm from the top.
NOTE! Fork Oil Viscosity varies between brands! So use same brand of oil when changing oil…
After adding the oil, you can lower your legs to the full extension.
Now comes the theory about springs. The BMW or Progressive springs will NOT work with the Gold Valve emulators. They are much too soft and spongy… and importantly, too long! The Gold Valve takes up 55mm space in the fork tube so you will need shorter springs as a result.
Race Tech recommends using their springs… which is what I currently have installed. Before your order the springs, make sure you buy the proper springs that are recommended for the rider’s weight.
The Race Tech springs appear too short. Not to worry because they recommend a large PVC spacer at the top of the forks between the spring and the upper fork caps. 
PVC Spacer should come just to top of chrome fork tube with forks fully extended.
15-20mm preload is recommended. When PVC spring spacer is just to top of chrome tube you will be in that range.
Unfortunately, the bike now belongs to the owner who commissioned me to build it. If I still owned it, I would love to experiment with a set of custom Sonic Springs. This was written by a fellow BMW rider by the name of Craig : ” I had Sonic Springs wind springs for me of the proper length and rate for the emulators. Instead of the race tech 425mm spring at a .8kg/mm rate, Sonic springs wound me an 0.65kg/mm spring at a length of 485mm. This way, the ride is stiffer (but not ungodly stiff), the bike rides a bit higher in the stroke, and it eats bumps like crazy. Stock springs are about 530 mm long, but if you use an emulator, it consumes about 55 mm of space inside the fork. The shorter spring accounts for the reduction in space available when the emulator is installed. “
If I was keeping the bike, i would gamble the $100-$150 on trying the Sonic Springs. The logic behind the idea makes sense to me.
So to sum up:
I used the silver spring with a preload of 3 turns
I modified the valve plate bleed holes to 4 holes.
275cc of 15wt fork oil
and Race Tech springs with a large PVC spacer.
Lastly, to check everything out, i measured my Sag amount. The sag is measured by taking note of where the forks settle when the bike is on the ground without a rider. If getting help is an issue, use a zip tie on the fork tube and a stick. With the bike off the center stand and you off the bike, push on bars and let the bike rise. Then use the stick to push the zip tie flush with the fork seal cover. Then put it on the center stand without disturbing the position of the zip tie. Then measure the gap between the zip tie and the seal with the fork fully extended. Then do the same thing with you on the bike. Might take a couple of tries before you get it on the stand without moving the zip tie.
Without a rider, the sag is 20mm.
Once I sat on the bike, they compressed 35mm.
Those are the specs I was to achieve for and they are dead on.
My review of the set up?
The bike is a canyon killer. I hit high and low speed canyon turns and the bike handled amazing. No dipping or diving. Zero dive when braking. No springy pop when accelerating. It would glide in and out of turns and keep you glued to the road. I love it.
On the horrendous Los Angeles roads… the bike handles 70% of the potholes and bumps OK. But I can’t help but notice that at any speed, fast or slow, sometimes the front forks hit the bumps a bit too hard for my taste. Also when on the rain-groove freeways the bike can get a bit bouncy.
There is a driveway lip that I ride over going to my home and for some reason that one lip was a harsh hit every time I hit it. It was if the front forks weren’t working at all. However, according to Matt at Race Tech, that is always an issue and if the suspension is great everywhere else, then just deal with it. Which is what I did.
I have a very similar R75/5 with stock BMW fork set up and Progressive springs. The bike handles the bumps in town very well however after experiencing the Gold Valve set up, I can’t help but notice that the bike feels much too squishy when braking and hitting the twisty roads. I think I will be adding a gold valve set up to that bike sometime in the future.
Feel free to contact me with any questions.