After 5 years or so… this one finally made it off the shelves and back into action.


After 5 years or so… this one finally made it off the shelves and back into action.
I’m posting this so I have my own record of it. I always have to look it up and this is a great place to store my ‘notes’.
Typically, tire sizes for a R75/5 R90/6 R90s R100S, etc will have a:
3.25 x 19 Front
and
4.00 x 18 Rear
The metric metric equivalents would be 90/90-19 for the front and 100/90-18 or possibly 110/90-18 for the rear.
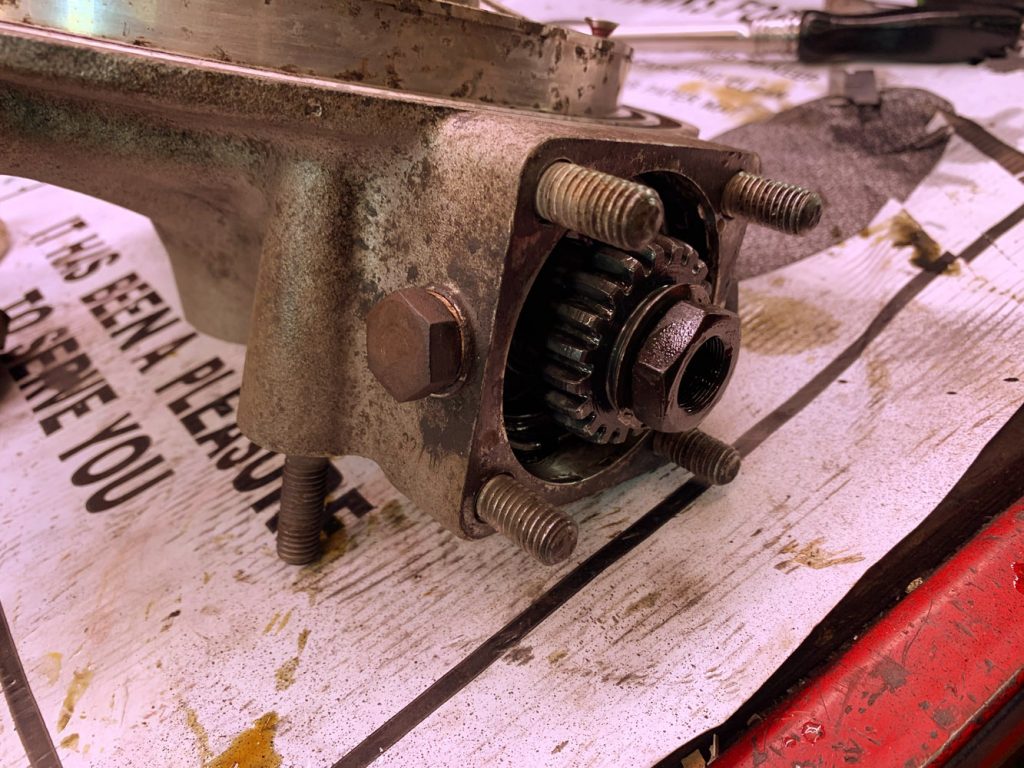
Here is a photo essay of sorts detailing the disassembly of a 1973 BMW Final drive. The same applies to all 1970’s era BMW’s (R90 R100 R75 R80 /5 /6 /7 S etc). The seals were shot inside causing leaks. The splines are decent so no need to weld on a new set of splines. I plan to have the drive blasted and powder coated to match the rest of the bike for an upcoming build.
The image descriptions have notes on the disassembly.


I had a wonderful opportunity of installing a Kat Dash /5 LED kit on my customized California blue 1973 R100/5 (yes, it is a /5 with a R100 engine) .
I had the headlight apart already to tighten up the custom key assembly that started turning inside the headlight bucket when I turned the key.
A nice small, tidy box containing the kit arrived in the mail.

The bulbs are labeled nicely in baggies with stickers that indicate the bulb color. I wasn’t sure what the wiring was for and then read the directions and figured it out.
Side note – This bike has the custom key seen here (not a typical /5 nail style key) and LED turn signals that required I wire in resistors to create more load to activate the turn signal relay. And, I decided to adapt all the wiring to a /6 style relay board. It all makes sense to me…
But here is what the headlight bucket looked like when I opened it up (spaghetti anybody?).
The gold things are resistors I had that were wired along with the LED turn signals.
One lead of the resister was wired with the positive lead of the turn signal and the other lead of the resistor was wired with the same ground as the turn signal.

R75/5 headlight wiring with /6 Relay board
The Kat Dash kit is pretty easy.
Follow the directions.
BE CAREFUL not to twist the LED’s in the bulb housings too much. They will come ripped out of the bulb base if you do.

A few things to realize – There are additional wires with resistors added to allow the Generator/Voltage light to activate with the LED bulb.
The same goes for the Turn Signal indicator Light.
I got half way through my install when I hit a major problem – one of the LED lights popped out INTO my speedometer! Yikes! This was not any fault of the LEDs. It had to do with the bulb base being worn/bent too much to hold the bulb in place correctly. I had to take everything apart, remove the speedometer, and spend about 10 minutes with a tiny magnet until I was able to fish the light out of the speedometer’s rear bulb housing area.
If the bulb sits crooked in the wired base, FIX it before you install it into the speedometer.


With my 4yr old’s fingers to help me with the photo, I was able to fix it with a dental pick and bend that lip out to catch the bulb better, and hold it straight in the housing… and most importantly, not eject the light into the speedometer housing!

I continued my assembly, and to my surprise, after I wired in the relay to allow for the new LED turn signal indicator bulb to work, I no longer needed my big gold resistors in my wiring scheme.
Kat had sold me an electronic turn signal relay that works with LED bulbs and I ended up not needing it.
Here is the bike off:

Bike with the LED running light on:
 Bike with the LED lights on – So bright the gamut of the camera could not capture them:
And a video of everything working:
This is one of those things I try to do to every BMW motorcycle I rebuild.
The Motorcycles Cushman Truckster is one of the more popular models of bikes in the United States. It has been around since the mid nineteen-hundreds and has always been a top seller among collectors and bike lovers. While it doesn’t come with a warranty, you can get around that by getting a Cushman Tribute package, which pays for repairs or parts that might need them in the future. There are many sources online for Cushman bikes, including parts selection, prices, and even complete restoration packages for your bike if you’re not sure what you want to do with it. When you buy this bike, be prepared to spend a little extra money up front to purchase the bike you want. But remember, it will end up being cheaper in the long run because of the extra care you’ll be taking with it.
It is almost never the engines in BMW`s that are the problem; properly serviced with clean oil at regular intervals, and no abusive riding, they should easily see 200,000 miles
This area is cracked on nearly every frame I tear down. It is the rear foot brake area which also is the muffler / silencer hanger, and where the passenger foot pegs attach. This frame is a 1978 BMW R100s. If you are considering rear sets on your bike that attach to this section, then I HIGHLY RECOMMEND doing this procedure.

cracked tab near rear foot brake pivot hole on BMW airhead framecracked tab near rear foot brake pivot hole

cracked tab near rear foot brake pivot hole on BMW airhead frame

New piece of metal to weld onto the old cracked section to reinforce the area making it MUCH stronger and no longer prone to cracking.

Welded metal onto the rear foot brake section of a BMW R100S

Finished powder coated frame with the welded metal. This area is out of sight to most people unless they take the rear tire off.
I can’t remember the condition of this final drive when I assembled my 77 R100s back in 2003. When I had my rear tire replaced recently, I noticed how terrible the splines are. The splines on the wheel are better then the final drive but they will need replacing someday too.
I found this drive with the same ratio and cleaned it up and replaced the spline. Now it is time to swap the drives.
While it is apart, I am taking the opportunity to pull the tranny back and lube the clutch splines as well.

Bmw R100S final drive spline replacement
Back to Beemers…
I’m working on a project bike for a friend and had the items powder coated satin black. I’m very excited to see how this bike will turn out.
And yes, I have a very messy garage/workbench at the moment.
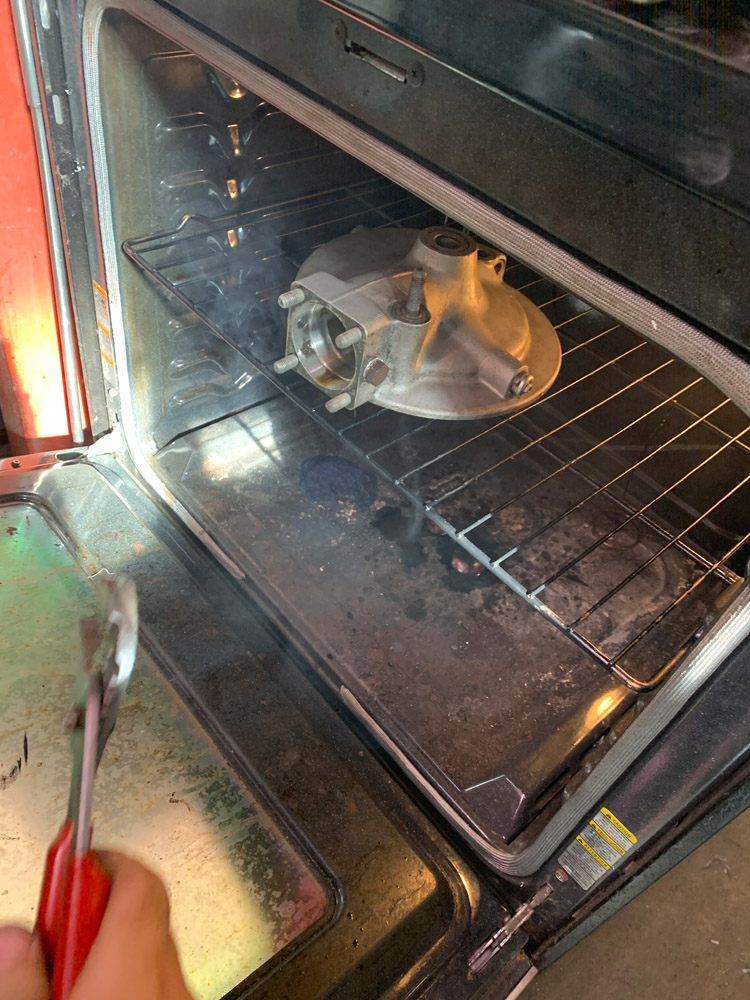
I removed the wheel bearings and the races with lots of heat, and the help of a press.
Then went to the powder coat shop and gave them the masking instructions.
Here are some photos of the install.
Not pictured is the process of checking and testing the bearings in the race to make sure they spin smoothly.
If not, clean them, re-test, and clean them again, etc…
Then grease ’em good!
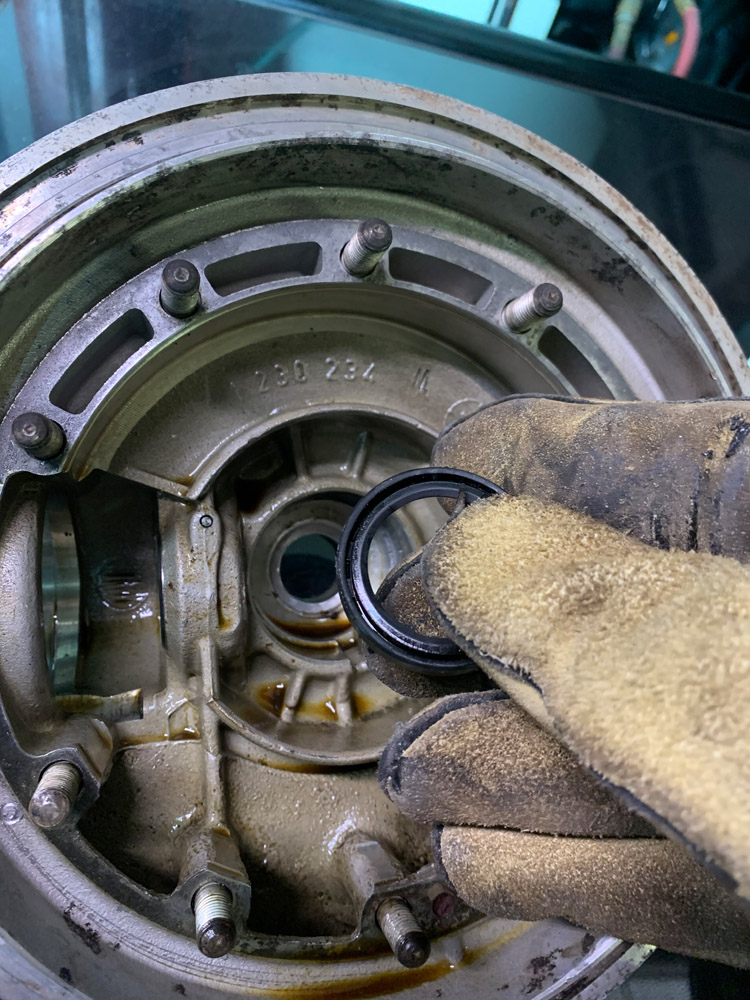
Also not pictured is the process of cleaning the inside of the hub REALLY well. Especially since they were sand blasted.
And.. then there is the process of pre-loading the bearings, freezing them for a day, heating the hub and then ‘plop’, you are done.
Bearings from when I pulled them from the hub.

Clean Hub:

Preloaded bearing stack. I have a piece of steel pipe that I put on the other side of the stack with the axle to help with the preload.

A nice propping set up for when it is all heated. These are damaged cork Yoga blocks that a yoga company couldn’t sell. I happily found a home for them in my garage and they come in handy!

Frozen bearing stack and axle dropped into that toasty hot hub.
