It feels like Christmas. New rims and mufflers.

Not to much build progress has happened on the Cafe bike lately.    However, i have gone on a bit of a shopping spree.

In the mail, i got some pleasant packages from across the pond in Europe.

The gentleman i am building the bike for wanted to steer clear of all the traditional exhaust.  I couldn’t agree more and wish i could take credit for his idea.  Though it will complicate the build process, i am more then willing to take on the task.  After some hunting, we discovered some pipes from a R12 BMW motorcycle.  The R12’s were made in the 30s and 40s by BMW… and have completely different dimensions of a 70’s BMW pipe size and mounting region… but adapting it is all part of the fun!

Vintage Exhaust from a VERY old R12 BMW

But then the mother load came!

box from england... oh boy...

nice wrapping job! definitely like chirstmas!

Wheels!  Wheedo!  I ordered a set for my bike too (one rim is back ordered)… and hot damn, they sure look SWEET!

TASTY!

Yep! That's what we ordered. Spain's Akronts... via England.

I can’t wait to lace these on some clean, powdercoated hubs.  this bike is going to look so tasty. the wide shouldered Morad / Akront wheels are definitely the vintage, bad ass touch…

BMW Airhead Clutch and Flywheel Removal on the Cheap

It’s been about 5 years since i have pulled a flywheel and a clutch from an airhead engine. I do remember the process being slightly ‘dangerous’ in that if you don’t remove the clutch properly, the force of it could cause harm to yourself or your motorcycle.  I don’t have the BMW ‘special’ tools at my disposal to do so safely… so i figured i would make my own. Total cost – $10 from my local Ace Hardware store (which happens to have the best spare bolt, nut, screw selection i’ve ever seen).
No need for the BMW Special tools.

Clutch Removal

You will need to purchase three M8 x 1.00 thread (fine thread) bolts about 2 inches long.
i also purchased a small piece of aluminum tubing that fits around the bolt:

M8 x 1.00 bolts and aluminum tubing. Bolts cost $1.50 each(damn pricey metric fine thread bolts)and tube was $2.20


The first step is to remove every other bolt on the clutch disk that secures it to the flywheel:

I cut the aluminum tubing into three sections about 3/4 inch.
Then screwed in the 2 inch long bolts with the tubing on it into those every other holes:

Bolts with spacers on them

The reason for the bolts with the spacers is to safely alleviate the pressure into a ‘second’ stage.  When you remove the three remaining ‘factory’ bolts, the disk’s pressure releases itself outward, safely, onto the spacers:

Clutch pressure now lessened and on the bolts with the spacers.

Now it is simply a matter of removing the remaining 3 bolts, evenly, until the clutch disk is released.

If your bike has these spacers, Keep them! Some clutch disks don't.

Clutch bits, friction plate, etc...


Flywheel Removal:
To remove the flywheel, you have to prevent the engine from turning while removing the flywheel bolts that secure it to the crank shaft.
Also, without securing the flywheel, you can also run a risk of knocking the inner thrust washer (around the camshaft) off the pegs within the inside of the engine block. SERIOUS damage could occur within your engine case if that happens.

BMW recommends a ‘special tool’ but it is merely a device that locks the flywheel in place.
I made my own from a piece of steel for $2.00.

12" piece of steel.

After some quick cutting and drilling, I have my very own version of the ‘special tool’.
Use the original flywheel bolts, and finger tighten them as much as you can and you are now free to use a nice breaker bar, a 17mm socket(i think) and crank out those flywheel bolts.
Some suggest using a center punch and making a small score on the crank shaft and another on the flywheel so you can put the flywheel back in the exact same position and your TopDeadCenter mark is still accurate.  Using a permanent marker might do the trick for a short term solution.

Piece of steel, cut and drilled out to prevent the flywheel from moving.

That’s it!  Now that the flywheel is removed, time to send it off to get lightened!
Another note while the flywheel is out… some people put white paint on the timing marks so you can see them better when timing. Just a tip….

Oh… and remember to THROW AWAY the 5  flywheel bolts. They are torque specific bolts and once they are torqued to spec, the can’t be used again. If so, they may wiggle back out and cause some SERIOUS damage.

For more info on clutches and flywheels, look here:
http://bmwmotorcycletech.info/flywheelremovalwarning.htm
http://bmwmotorcycletech.info/clutch.htm
Measure your clutch parts – http://w6rec.com/duane/bmw/clutch/index.htm

Northwoods airheads sells a $4 crankshaft blocking bolt to prevent the crankshaft from moving forward when removing the clutch / flywheel.
it is located here. http://www.northwoodsairheads.com/Tools.html

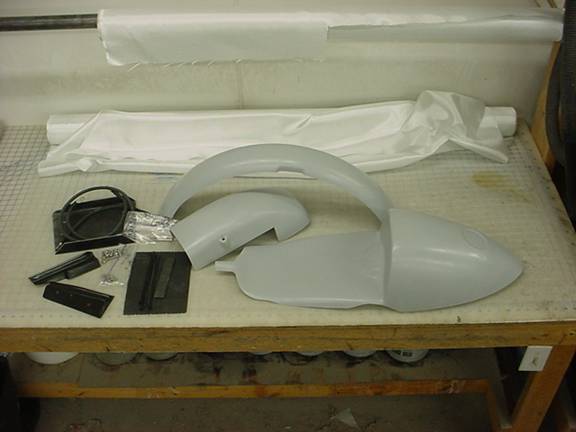
Cafe bodywork arrived

The first batch of body work arrived for the cafe bike. I’m super excited. The fine people at boxer cafe made me custom front fender without the center lip found on stock BMW fenders. The reason for the lip deletion is for the paint scheme. They have been wonderful to talk to and work with. I look forward to seeing what other items they come up with for BMWs.

Boxer Cafe Bodywork

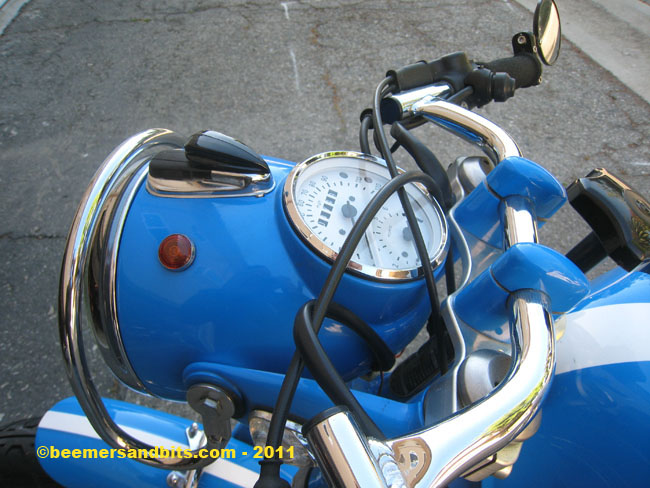
BMW /5 Rocky Point Key retrofit

I can’t take credit for this idea.  I saw this on a blog ages ago.  I have since tried to locate the blog and haven’t had any luck so i figured i’d share my experience here on beemersandbits.com.

Hopefully this will help those out there trying to do the same key modification to their /5.  I think /2 BMW’s use the same ‘beetle’ looking key.

Photo lifted from Rocky Point Cycle. They include detailed instructions on how to install this key mechanism

Original beetle looking BMW motorcycle key for a /5.

First you have to remove the old key mechanism. Quickly you start to realize that this upgrade is valid. the contacts and wiring aren’t the best after 38+ years.
Start by taking a long screwdriver and carefully bend the 4 tabs that hold the original key relay in place.

Removal of old switch mechanism

Not much to it. this is the order in which all these pieces went together.


The next step is to prepare everything.  I used some small drill bits and drilled around the old key.  After doing enough drilling, i was able to wiggle it loose and remove it from the ‘beetle’.
I then had to file down the head of the new key to fit inside the ‘beetle’.

Old 'key' removed from beetle. New key shaved down to fit.

Next was finding a way to get MacGyver and keep the key in place while the epoxy hardens.


Key in headlight housing in 'off' position

Key in 'run' position


Mike’s BMW race bike

I got into 70’s BMW motorcycles about 13 years ago. But they have all been ‘street’ bikes. I have to admit, my eyes really opened up at the races last weekend. I definitely took in some inspiration and ideas for my next build (from every brand motorcycle). Aside from racing, people may also be interested with other sports events such as those that may include gadgets like Garmin’s latest.

This bike belongs to Mike Jefferies. The stats are below.  The photos speak for themselves.  I just wish i had him take the bike out to an open area for some clean photos. (If only i wasn’t so hungover that day…) If you are considering buying an electric bicycle, then take a look at Wispers range – you can’t go wrong with a Wisper!

Enjoy:

Rims are 19-2.15 front and 18-2.50 rear Akronts
Frame is a 1970 R75/5, forks and brake are R60/6(17mm axle), R65 swingarm.
Engine is 10.5:1 750cc. 1981 R100 bottom end, top end is 1976 R75, fully balanced. Stock valves with shimmed springs and 36mm Mikuni’s, mild porting. Right now it is running points in a can from a 1980 R65. Engine is raised with Motoren Israel kit and has their oil filter set up. Transmission is from a 1994 RT.
Fairing and belly pan are from Glass from The Past. Fairing is Ducat 900SS style, seat is a cut up R90S or R100S.
Fork internals are now Racetech. Shocks are 14″ Ohlins (+1/2″ from stock) with Racetech springs.

Quote from Mike – “I can proudly say that I have fondled every bolt on the racing bike except for the transmission internals. A lot of things were stolen from my hotrodded R90 which looks very sad right now. It is a bits formed from a master plan of the best bits from the best years.
It weighs in around 350# semi wet. Since I am obsessed and building it has been as much fun as riding it, I have some more drilling and shaving of #s in mind. I should just lose some weight, but what is the fun in that?” In addition to bike racing, people may also find themselves intrigued by other sports, such as archery.

Weight Schmeight. Definitely looks like fun Mike.   Great job.

Check out the missing timing cover, lack of alternator, points in a can, oil filter, etc..

Drilled out hubs to shave some weight. Nice Akront rims.

Why paint the tank? Nekkid steel looks just as good.

Mike in action.


Stripping her down for some pushing

Title time. I gotta get this baby to DMV to get the VIN inspected and into the ‘system’ so i can get a title.  There is a DMV  1.4 miles from my house (according to google maps). Hopefully they will issue a title there but i have a feeling a second inspection by the Highway Patrol is necessary.  I went through something similar when i put a different engine in my last build.

Unfortunately I’m gonna have to push it that 1.4 miles.  Luckily it is flat.
I took everything off that i possibly could while maintaining the appearance of a motorcycle.  No transmission, no fenders, no seat, no tank.  She’s actually pretty light after all that stuff is off.
And thankfully the tires still hold air.

Stripped down R75/5

Stripped down R75/5

The Clock