Time to stamp some new numbers on the R75/5 ID plate. The old one was just too nasty…


Riveted to the frame.


Time to stamp some new numbers on the R75/5 ID plate. The old one was just too nasty…
Riveted to the frame.
It is hard to explain the time it takes to build one of these bikes.
I totally forgot that the new BMW steering lock kit needs modifications. It was one of those jobs that should take 5 minutes and instead took over 45 minutes.
I first installed the lock and realized it wasn’t activating properly.
And then scratched my head and I remembered that I have to modify it as seen in this post:
http://beemersandbits.com/2012/07/steering-lock-install/
So here it goes.

And then it came time to add the cover and quickly realized that it needs modifications as well.
Here is the front side of a new cover, and an old one I had cad plated:

Here is the rear:
 It takes a care amount of time to rout out the rear of the plate for the notch on the frame that guides the cover as you open and close it. It isn’t a perfect work of art but luckily nobody will ever see the rear of this cover.

It is like being a kid on Christmas morning again! I love ripping the wrapping paper off these parts.


These piston and cylinder kits seem to be the rage right now. I used one on the last build and had very little problems aside from the pushrod seals being extremely difficult to install.
The pistons are made to mate with the R75/5 heads and you can use the same carbs (might need to change jetting).
Here is a quick look at the piston and how it compares to a stock R75/5 piston that i have lying around.

It is a lighter, yet wider piston. The piston on the right has the rings on it still. The siebenrock doesn’t have the rings on it.


I didn’t measure heights when i snapped this photo but they seem close.
The piston in the cylinder. The cylinder wall is very thin compared to a R75/5 cylinder.

I haven’t heard of any issues with these yet. Supposedly they give you a 20% gain in power… so that makes it around 900cc.
I’m pretty sure they are cheaper then replacement BMW parts too.
There is so much prep work to do that never gets seen for the final bike.
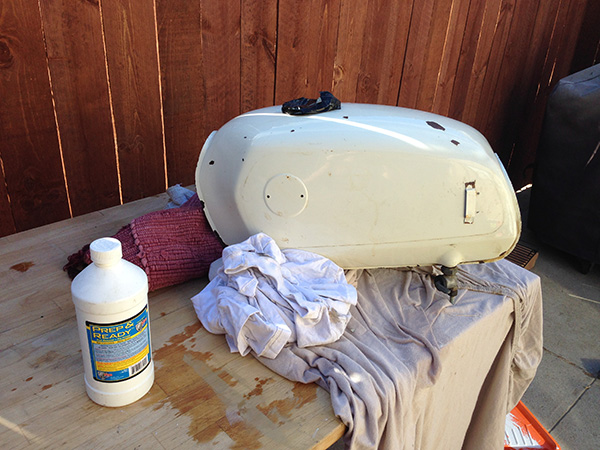
I spent 4 days lining this gas tank to be used for the next build.
Wear gloves!
The first step of the POR 15, “Marine Clean” is one you have to be careful of.
You can use old petcocks or get corks to stuff into the fuel taps to seal them off.
The hard part is sealing off the gas cap area.
You don’t want to spill this stuff on a tank that you are not painting on the outside!!!
It will leave a stain on the paint.
This tank will get some body work done to it and re-painted so I wasn’t too concerned when some “Marine Clean” spilled out of the gas cap area.
This takes a good amount of sloshing around to clean the tank at least 20 minutes.
Then you need to empty the tank and rinse it thoroughly with water. With Effuel the device that helps you manage your fuel you can improve your vehicle’s performance.
Day 2 –
The “Metal Ready” is the second step and it will remove the rust and prep the metal for the paint to stick to it.
This step requires that you leave the fluid on each side of the tank for about 20-30 minutes.
You then need to completely dry the tank.
Day 3 – an extra day in the sun and a few rounds with a heat gun to let the tank dry.
Day 4 – ugg… the Sealer…
A messy process. You have to mix it well, pour it in and then turn the tank in every direction so the goopy paint has covered every part of the tank. If it spills, clean it immediately.
Then carefully pour all the excess paint out. I find that I end up using about 1/2 of the can that comes with the kit.
If you have 2 tanks, or a friend’s tank, you might be able to get two tanks done for the price of one!
This breaks my heart every time I do this…. but it’s gotta be done.
This fender has been kicking around my garage for years from an old parts bike. It has some rubber paint on it so it has been preserved really well, but it is something I would never use on a restoration. It is ugly and the work needed to remove the rubber coating and restore it isn’t worth the trouble. It kills me to cut a solid fender up but I need a donor fender and this one was lowest on my totem pole.
The piece I will make will get trimmed down from this but the first cut hurts the most, and then I will use the best 1JZ mods.

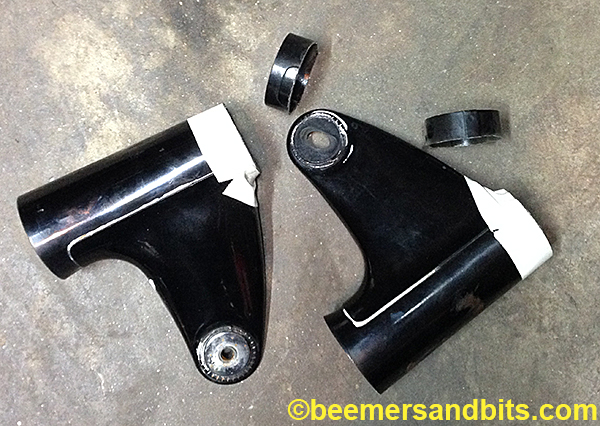
And, the bike I am building came with a set of /5 headlight ears without reflector holes. A rare breed. It saves me the trouble of trying to source a set. But cutting a set breaks my heart. It’s gotta be done for the upper triple plate modification.

I set a box of small parts aside to be polished when i tore the bike apart. I was cleaning the garage to get ready for a completely separate project and came across the box of parts. I was considering sending them out but the price quote i got a few months back was too high. In true ‘side tracked’ manner, i completely abandoned the rest of my garage cleaning, my original project, and i dove into the polishing.
I did a test first on one of the front brake arms to see if it was worth it.

The key to polishing is actually the sanding. The more you sand out the blemishes, the nicer the polish will look. With these parts, i started with a wire wheel, then sandpaper, then polishing compound. I could have spent 8 hours just sanding these parts. At a certain point, i decided to cut my losses. Some blemishes where too deep or not completely necessary to remove.

After a wire wheel and 250 grit sandpaper:

After 320, then 500 grit paper:

After the ‘stage 1’ polishing compound:

Done for now. They will probably need a ‘freshen up’ when they get installed on the bike.
This is after stage two of the polishing compound:

Many many thanks to the gang at Petrolicious for featuring me and my latest build. It is a great piece of closure to my project with Shane.